Wednesday, October 30, 2013

POOL PARTY REDUX

Howdy Y'all!

This week has been more of the same as we've dealt with the 'will it rain or not' question. Unfortunately, those working on our home generally choose not to work if there is a hint of rain in the air. Surprisingly, even though Texas isn't monsoon country, it does rain a fair amount beginning this time of the year. 

We've been witnessing the continuous progress of the guys layering texture on our walls, and for the first time, we can begin to see the real outline of the interior and visualize where all of the money is going. And, we are at the stage where things are going to get painstakingly slow, while still making progress forward. At the time of these pics from yesterday, most of the interior texturing was done, and by the time that I finish writing this blog post, it should be totally complete.


Here are a couple of pictures of Ernesto applying the plaster base to the dining room before they begin to hand-trowel the designs into wall.


Of course, we always thought that they just applied the mud directly from a hand bucket, but technology has taken hold and this is the way that they minimize waste with the product, and apply a consistent layer. One guy sprays a thick layer of mud on the wall, and he is followed by two guys working the layer into the desired texture pattern. It was amazing to us how consistent the design has been across multiple rooms. Even I could do this (just the sprayer part)!

The proverbial 'paint is drying' except that it is plaster.
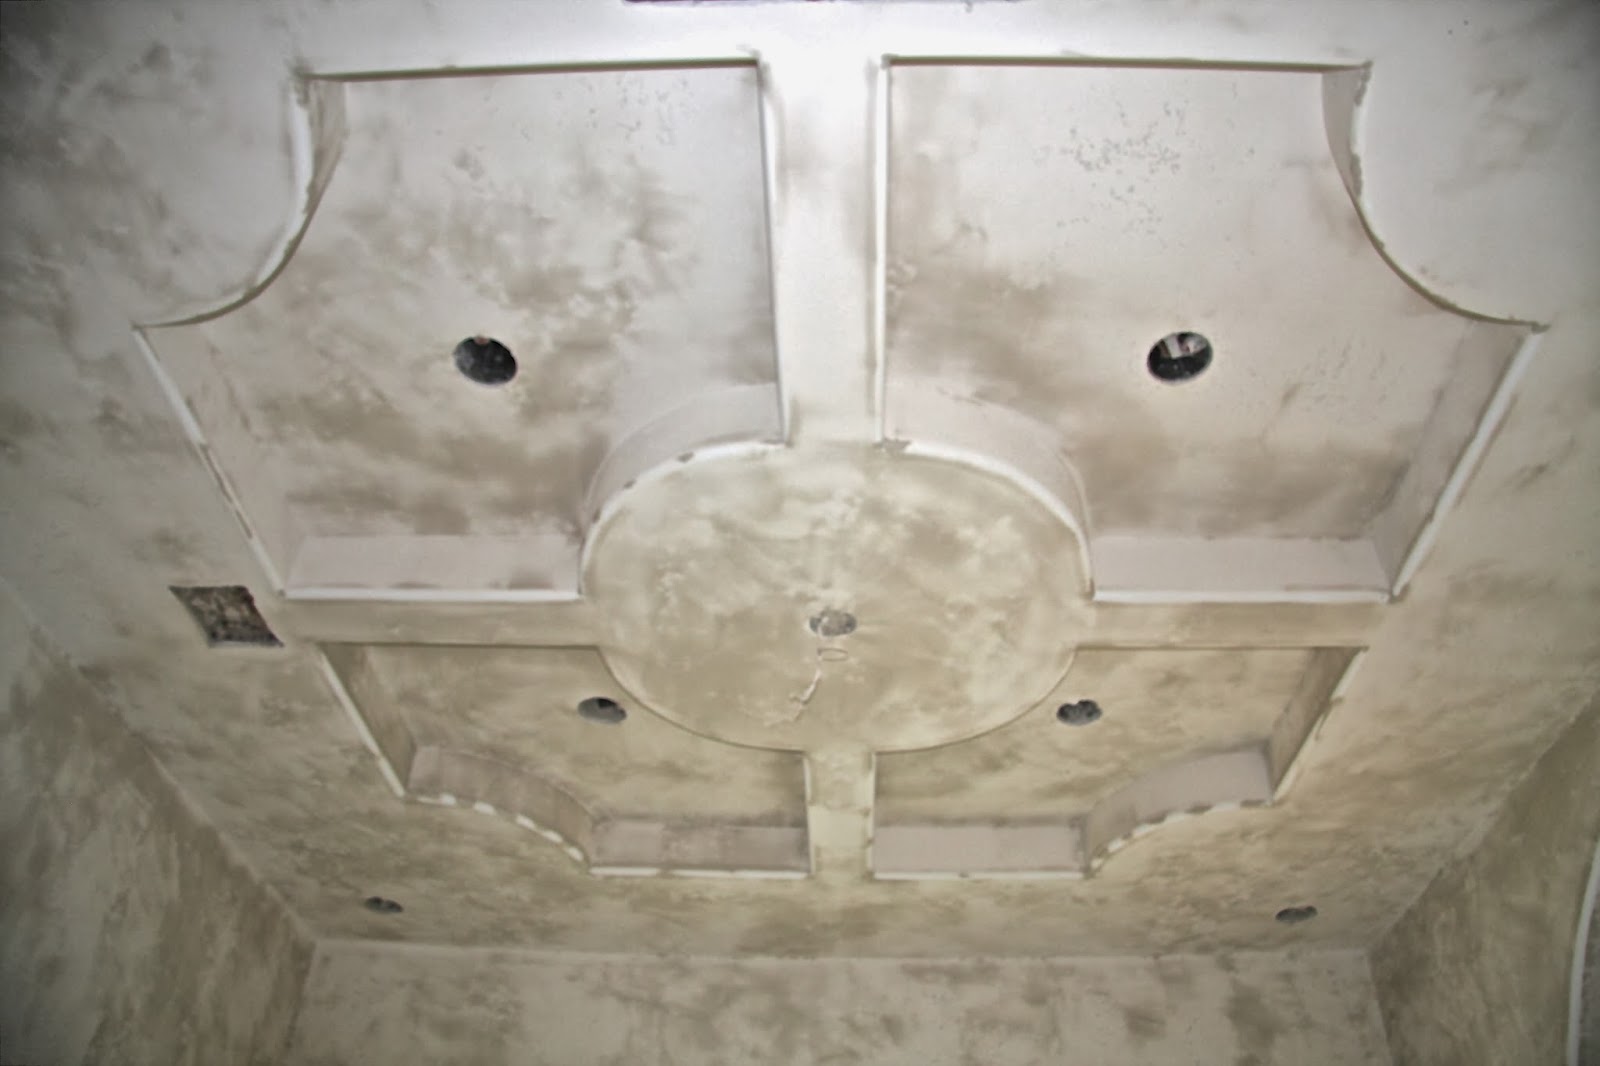
Office/Den ceiling.
After a couple of weeks of delay ('delay' is becoming the single most used word in my vocabulary these days) the team from Innovative Water Solutions arrived to start building the pad for our water collection tank. Essentially, we are 'off the grid' out here with respect to city water connections. Simply said, there ain't none! So, your choice is digging a well south towards China about 1000 feet down, or collecting rainwater. We chose to collect rainwater. While all of this may sound primitive, it is actually quite advanced with respect to the technology, and best of all, after the costs of installing the equipment, it's basically free!

Our system will consist of a 51,000 gallon galvanized tank lined with felt and a heavy gauge vinyl food-grade liner to retain all of the water. The principle is quite simple - water comes off of the roof, goes down the drainpipes into a 300 foot collection tube that flows through a couple of primary filter systems into the collection tank. To get the water back to the house, it is pumped through a separate pressurized line into the house, then into a set of filters and UV system that cleanses the water to a >5 micron particle level. The water is actually biologically cleaner than city water, and has no chemicals in it other than what came out of the sky. At the faucet, it appears and behaves as if you are connected to city water. (Really, we're not camping out here.) Obviously, I've simplified the technical discussion to the basic level (okay, that is the way it was explained to me), but it works, and is becoming a major source of water retrieval out here on the ranch sites. The tank should certainly outlive our lifespan by a number of years. Hopefully, we will have a pad and tank in place in less than 10 days and start collecting water soon.
The tank and pad crew from IWS - Joey, Mark, Austin, and Paul (PM).
Surveying and laser-leveling the pad site.
Working the big boy toys. (This is why I went to college.)
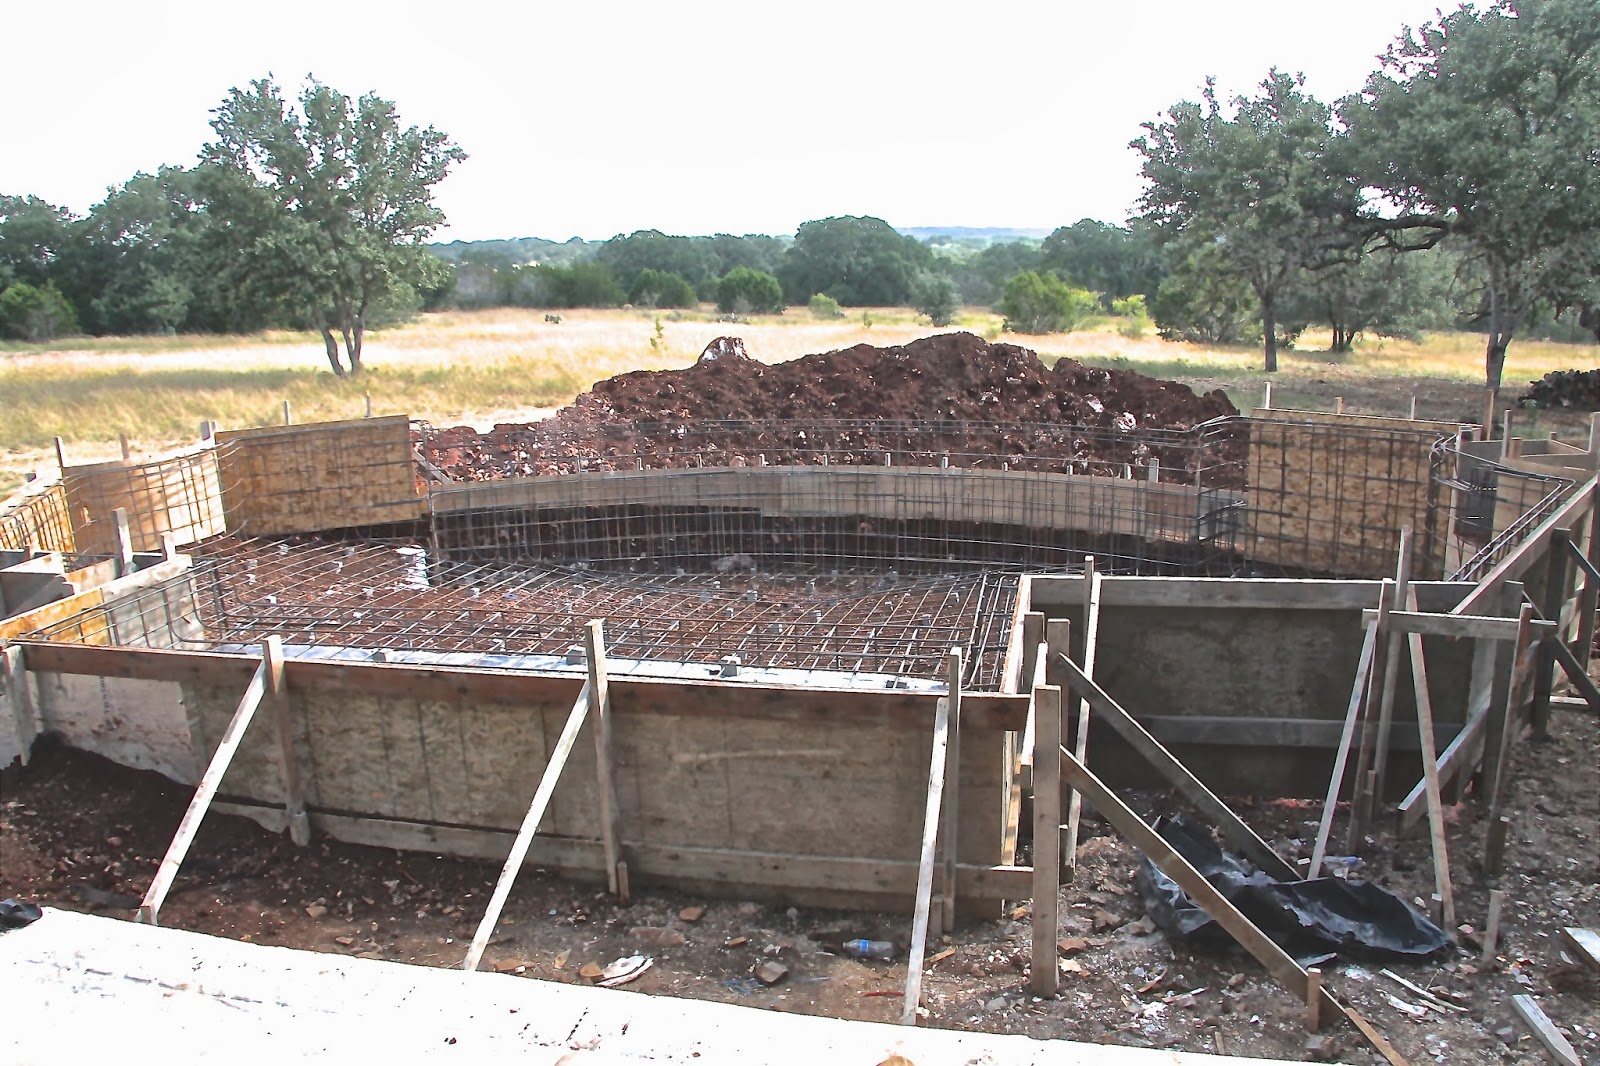
The other significant activity is the continuing progress on the pool project. After the initial dig and forming of the pool last week, the guys came back on Monday to start laying the rebar grid for the gunite/concrete layer. Thankfully, we had very few rocks in this area, so the initial dig went easily and quickly. (Rocks out here have a tendency to have multiple babies, which means mucho dinero in equipment costs.) The finished rebar product yesterday was a work of art. We've never seen rebar work so precise, or bent so effortlessly to create a rounded edge. 

Laying the first rebar lines for the gunite/concrete layer.
The finished rebar product. The open area in the back is the 'infinity' edge.
A rebar work of art!
Finished!
Today, the plumbers were back to start laying in the fittings for the pool filters, water effects, collection basin pumps, pool pumps, and lines to the pool equipment.

Bending the lines with a propane heater torch.
Laying in the lines for the skimmers, pumps and water returns.
A different view from the swim step side.
Collection basin below the infinity edge.
Of course, now comes the discussion with the fence companies so that the cattle and deer don't view the pool as a big water trough!

That's all for now!
See ya later,
- John and Jan - 

Wednesday, October 23, 2013

POOL PARTY!

Howdy Y'all!

When we last left you, things were starting to slow down as the interior portion of the house was 'taped and floated', (contractor-speak for taping and mudding the drywall seams). Given the number of seams and screws in the walls, it took three guys five days to complete the work. That officially ended today, and a separate team of people are here to apply the final 'mud' texturing to each of the walls in the house. 
Great Room final taping before texturing.
(Notice the OSHA approved scaffolding.)
We selected four textures - Four Seasons, Texas Trowel, Standard Trowel, and Orange Peel for the entire house. 90% will be in Four Seasons, and the rest is a mixed bag of textures. You might ask why all of the different textures? (I did.) That's because of how paint and faux staining is applied, and how the different textures reflect depth of the finish. A bit complicated for me, but Jan understands it all.
Jan's texturing instructions to the Builder.
Jan also selected the granite for the counters in the house (she's making me do this), which is a final relief to have this behind us. She selected Amore Italiano, Santa Cecilia, Absolute Black and two others which I have absolutely no idea of the name - probably Expensiosa and Cantafordia.


We also had a bit of a 'do over' on the niches in the Motor Court wall, and some finish work on the front doors. The original niches were formed with a six degree slope in the bottom portion for water runoff, which meant anything like a big vase would simply fall out of the niche. Not good, so the stucco guys came back and flattened the niche base to a 1/2" slope, and added some 'chins' while they were at it. Looks better, and certainly works better.

Do-Over to fix the niches and add chins to the base.
Before final painting. Much better!
The other big change this week is that the Pool Guys arrived to start digging and framing. The pool design we created with Austintatious Pools (yup, that's their name) has a negative, or infinity, edge, and it took us roughly four meetings to get the pool design, decking and equipment finalized, which has to be a record. Michael Hurosky is one of those guys where no moss grows under his feet.  We also did not want the pool deck to be appreciably lower than the patio level. To achieve both goals, they will be building up, as well as, digging down. So far we are blessed with pretty good soil, rather than the rocks that are so prevalent in this area that can make pool building a nightmare. 
Michael (owner) and Brian (PM) getting some free advertising.
The shallow end will be about 3 1/2 feet transitioning down to 6 feet at the infinity edge. In this way we still enjoy the benefit of the negative edge, but not detract or lose any of the view from beyond the pool. (This also helps the folks that aren't Michael Phelps-level swimmers from drowning after a few toddies.) The other goal will also be to build the pool, and fence around the perimeter edge, before the cattle and deer figure out where the water is. Cattle like nothing better than a nice, large water basin to slurp from (as attested to by one of our ranch neighbors).
Laying out the pool and decking outline.
(Notice that my lovely wife is busy supervising the effort.)

Digging the hole.
Framing the outer edges.
(We told you they were fast!)
More views.
That's all for now.
See ya later!
- John and Jan -

Tuesday, October 15, 2013

MUD IN THE HOUSE!


Howdy Y'all!

Jan and I are back from a mini, 10 day 'getaway' vacation to Cabo San Lucas. We traded 90 degree weather in San Marcos for 90 degree weather in Cabo, but... Cabo has a beach!! It is typically where we head for at least a week every year, and it was a welcomed relief to get away from the building activity and just veg for awhile. Unfortunately, our Spanish hasn't progressed beyond ordering cervezas and ceviche.

But, now we are back, and some progress was made while we were gone. This is the part of the build activity where big changes start to appear, but it is also the part where 'do overs' get very expensive. So, while it appears that changes are taking place, they are somewhat glacial in terms of speed. Lots of checking, and rechecking, by the project manager to make sure that details are observed and mistakes don't get covered up.

The picture below is a 'do over'. If you notice the center arch, you'll see that it has been raised 24 inches (compare to previous blog pics). It was originally the same height as the other arches, but we had a minor problem opening the door more than 30%. The top of the door kept hitting the arch, and we couldn't get through the doorway (okay, I couldn't get through the opening). It looked good on the architect's drawing, and made sense when it was framed. But, put a door in the frame and everything changed. We like it better this way. (The yellow electrical wire still has to be rerouted.)

New arched doorway.
We also came home to the beginnings of the spanish tile roof installation. About 2/3 of the roof is now installed, but can't be finished until we resolve a small issue with the outdoor fireplace stonework. Another architectural 'vision' that has some challenges in the real world application. 
Making progress. Still missing the ridge caps.
 Moving inside is where things are really happening, and the 'personality' of the house is starting to take place. Jesus is one of the three individuals applying tape, edging and mud on the newly erected sheetrock. (I think this is a cool job to have - walking around on 4-5 foot stilts all day long, playing with mud. How cool is that!)
Jesus putting up the edging over the front doorway.

We chose to have all of the wall edges in the house 'rounded' instead of standard 90 degree corners. 


This is the first house in which we've done this, so we didn't realize all of the work that goes into it. Pretty nifty technology that is fairly perfected these days. All of the edges, screws, and taped edges are surfaced with three layers of 'mud', before the texturing process can begin. This is a critical point that goes very slowly, but is important so that the surface becomes perfectly flat for the texturing phase. Also, if the opportunity is there for you, make the decision to screw the sheetrock in rather than just having it nailed. Not much more expensive, but certainly better in the long run not watching your walls slowly spit nails out over time.
Ceiling treatment in the Office/Den.
For the most part, the following pictures are of some of the finished rooms now waiting for an assortment of different textures that we've chosen for different parts of the house.
Great Room facing front entrance. This wall will be rock.
Great Room facing rear patio.
Great Room fireplace (so far).
Kitchen / Breakfast Area from Great Room.
Reverse view from the Kitchen.
Breakfast Area view from Kitchen.
Dining Room from the Foyer.
Powder Room ceiling.
Master Bathroom barrel ceiling and shower.
Media Room with step down.
At this point, your eyes are probably blurry from all of the sheetrock and tape pictures. 
This is Jan in Cabo trying to figure out how to put this water sculpture in her suitcase and still stay under 50 pounds.
Jan stealing the sculpture.
Well, that's all for now.
See ya later!
- John and Jan -